Imagine having a lightweight, compact device that can non-destructively assess and measure the properties of metals, such as retained austenite, within just 90 seconds. Our μ-X360s portable X-ray analyzer makes this possible, allowing experts better control over various components’ manufacturing, engineering, assembly, and quality control.
How Our Analyzer Measures Retained Austenite

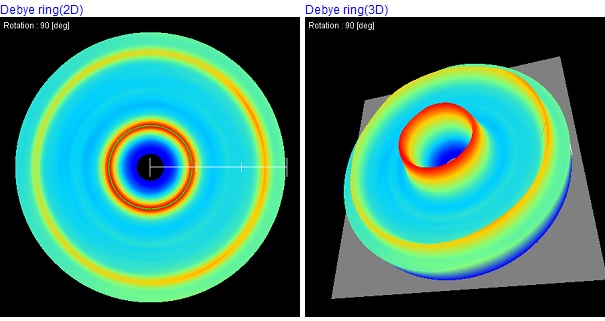
At the heart of the μ-X360s lies a state-of-the-art two-dimensional sensor that displays the full Debye-Scherrer rings, which are formed when X-rays diffract off the crystal planes in a material.
The sensor lets you view both the austenite and martensite phases, making it easier to analyze their characteristics. Peak profiles are accessible and viewable from the analyzer’s user-friendly software, giving you all the information you need right at your fingertips.
Retained austenite is calculated by comparing the intensities of the martensite and austenite peaks from their peak profiles.
Step-by-Step Guide to Using Our Analyzer

- Prepare your sample. The sample must have a bare surface. Polishing is not mandatory.
- Place the sample under the sensor unit, which weighs around 2.4 kilograms and measures 213 x107 x114 millimeters.
- Adjust the X-ray incident angle perpendicular to the surface and working distance, which is 27 millimeters from the surface.
- Close the shielding door to ensure safety during the measurement process.
- Start the measurement. With a single incident X-ray exposure and a two-dimensional detector using cosα technique-based equipment, results will be fully displayed after just 90 seconds.
- Validate your results. Our equipment uses non-contact and nondestructive X-ray diffraction to make measurements. The system can simultaneously output results from 500 orientations, providing high repeatability with full ring data averaging from those 500 results, even if samples are textured.
- Take note of the percentage of retained austenite that hasn’t transformed to martensite upon quenching if you’re using this function.
- Analyze your findings. You can use the retained austenite measurements to make important decisions and guide your manufacturing/production processes.
Request a Free Sample Measurement
Pulstec has been manufacturing electronic equipment since 1969. We’re known for our highly innovative, reliable, and user-friendly products, like the μ-X360s portable X-ray analyzer, MuraR surface hardness variation scanner, and our newest product, the s-Laue single crystal orientation system.
Visit our website to learn more about our easy-to-use portable analyzer, or contact us today to request a free demonstration or sample measurement!

