Residual Stresses
When it comes to the manufacturing, engineering, assembly, and quality control of components, it’s essential to understand how residual stresses may impact it during its lifecycle.
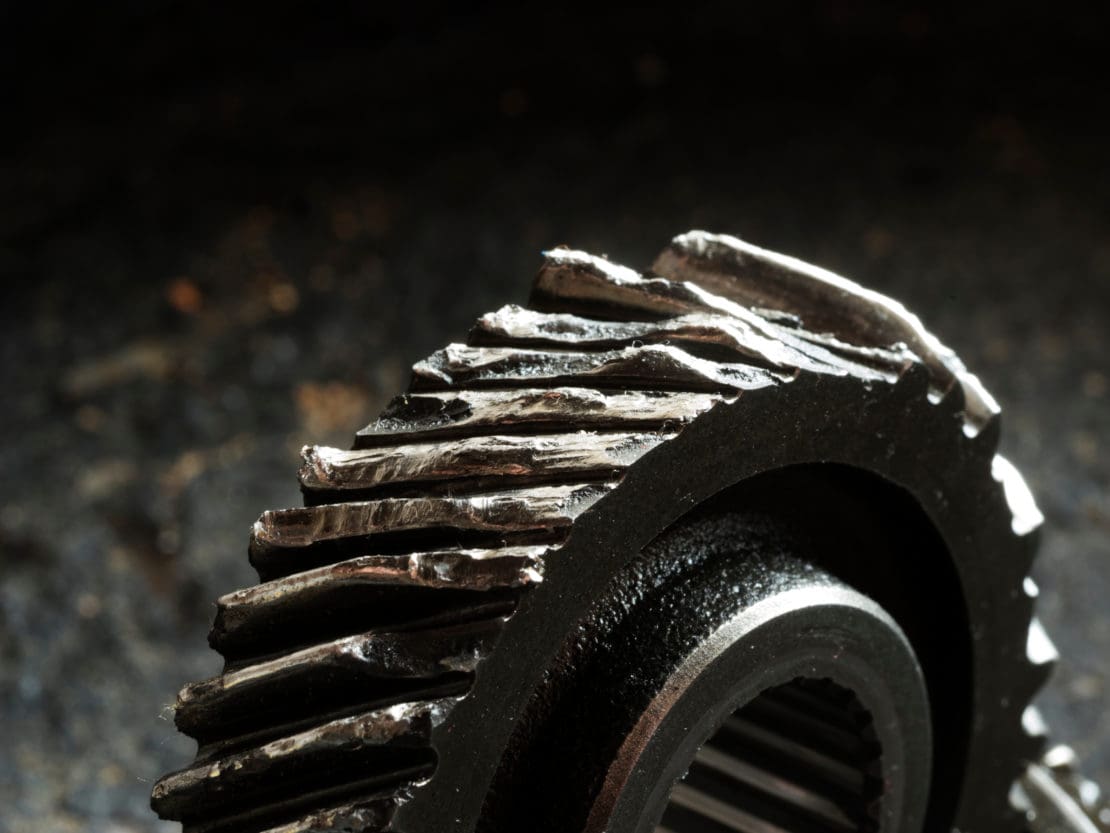
Residual stresses remain within an object even when that object is no longer impacted by thermal gradients or external loading. And, excessive residual stress in a component could lead to distortion, warping, and increased susceptibility to fracture and fatigue.
In this comprehensive overview, we’re going to look at the different types of residual stress, identify the major causes of these stresses, and highlight the impact and effects residual stresses can have on metal components. We’ll also briefly dive into measuring residual stresses and explore various measurement techniques and processes.
The Main Types of Residual Stress
Residual stresses can be categorized into three types: macro, micro, and sub-micro. In the real world, it is expected that components will have all of these stress categories present at varying degrees, since every manufacturing process creates some amount of residual stress.
Type 1: Macro
Macro-residual stresses refer to stresses that are developed within several grains of a material or object at one time. They are typically caused by processes that cause inhomogeneous distributions of strains, and any change in equilibrium of these macro stresses will result in changes to the dimensions of the object in question.
Type 2: Micro
Micro-residual stresses are stresses that develop in only one grain. These stresses can vary in size throughout different grains, and are most commonly caused by martensitic transformation. When a transformation occurs within a material and there is an incomplete transformation of austenite, micro-residual stresses are formed when martensite volumes are greater than that of austenite.
Type 3: Sub-Micro
Sub-micro residual stresses develop within several atomic lengths of one grain. These residual stresses are typically caused by crystalline defects such as dislocations and vacancies.
What Causes Residual Stress?
All three types of residual stresses are generally caused by manufacturing, thermal processes, machining, phase changes and surface treatment. Due to the various stresses and temperature gradients materials undergo while being shaped, formed, rolled, extruded, or otherwise manipulated to create a part or component, the resultant deformation leaves residual stresses within an object even after external loads are removed.
Read on to learn more about thermal processes, machining, phase changes and surface treatment, and how they cause residual stresses in components.

Thermal Process
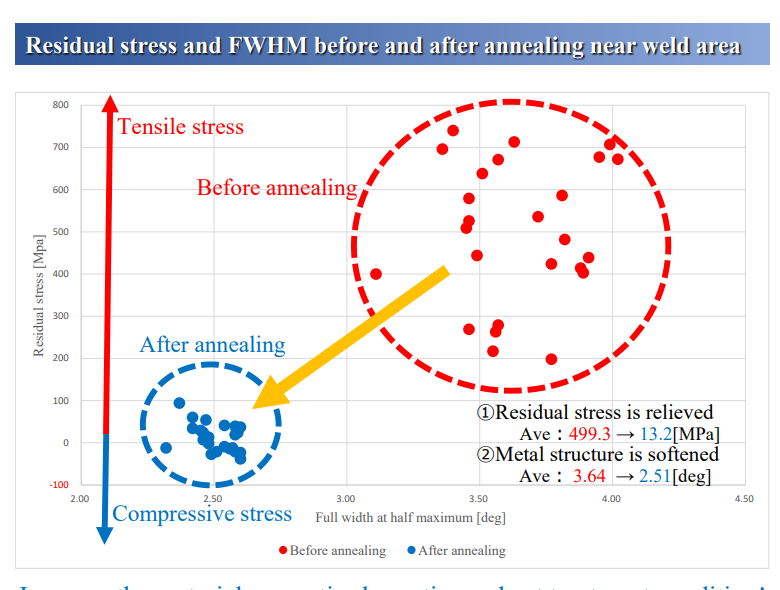
When thermal loads are applied to an object or material during a manufacturing process, temperature gradients within the material during cooling cause varying degrees of residual stress that remain within the component even after it has thoroughly cooled.
One of the best examples is residual stress in welding. Residual stress in welded components is caused by thermal processes resulting from complex thermal-mechanical-metallurgical interactions that occur during welding.

Machining
Next, when a material is machined, the process of drilling, milling, grinding, or planing can result in residual stresses. This is typically caused by heat during the machining process as well as mechanical and chemical factors.
During a machining operation, the material being worked on undergoes plastic deformation along with changes to its surface finish and microstructure.
Phase Changes
Next, when a material changes phase, there is a volume difference between the newly created phase and its surrounding material, which has not yet undergone the phase change itself. This volume difference causes the material to either expand or contract and results in residual stress.
Surface Treatment
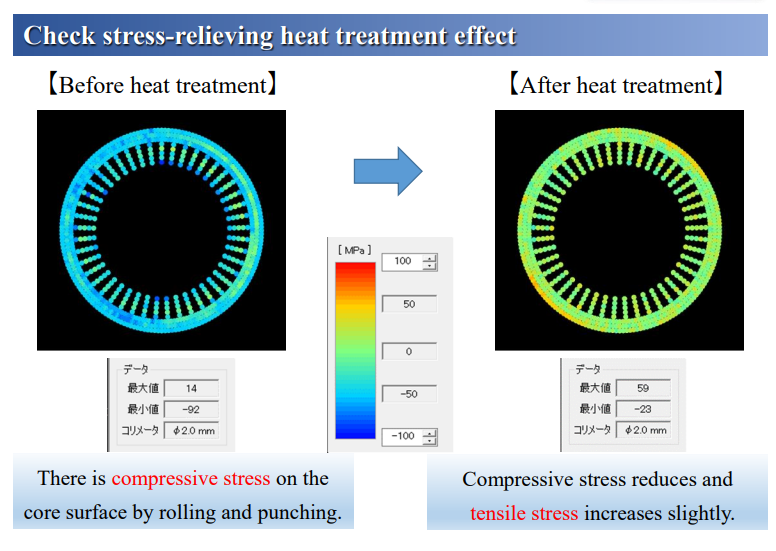
Unlike other causes, surface treatments, such as shot peening and laser peening, are used to intentionally add compressive residual stress.
Shot peening is a mechanical surface treatment technology that uses kinetic energy. In shot peening, numerous iron or metal particles are impacted onto a material at high velocity, forming numerous surface dimples and adding hardening and compressive residual stresses near the surface. Laser peening adds compressive residual stress near the surfaces using impact waves generated by short laser pulse irradiation.
What Are the Effects of Residual Stress?

Regardless of what causes residual stresses, it’s important to note that they can have both positive and negative effects on the longevity of a part or component.
Depending on the degree of residual stress present, the object’s fatigue life, corrosion resistance, and dimensional stability can be impacted. The exact degree to which residual stresses will affect a component’s life will depend on the specific application or use case and how frequently it undergoes loading.
Residual tensile stress is typically caused by grinding, welding, hardening, and other treatments. These tensile stresses can reduce fatigue life and increase the risks of component failure.
Compressive residual stress, on the other hand, can be beneficial to the part or component. Manufacturing processes, including shot peening and laser peening intentionally create compressive residual stress, which increases corrosion resistance and improves fatigue life.
Are Stress & Strain the Same?
No, stress and strain are not the same.
While stress refers to the amount of deforming force per unit area, strain refers to the apparent change in the length, volume, or shape of an object caused by stress. Stress can be measured by dividing Force by the Area over which it’s applied and has a standard unit of MPa (Mega Pascal), in which one Pascal is equal to 1 N/m2 (Newton per square meter), or ksi (Kilopound per square inch). Strain, on the other hand, does not have a unit; it can be measured by determining changes in the shape of an object compared to its original shape before any stresses were applied.
Measuring Residual Stress

There are a wide variety of ways to gather the data required to measure residual stresses within a part, component, or material. Measurement techniques can be categorized as either destructive or non-destructive.
As their names imply, destructive methods alter the physical properties of the component being measured, while non-destructive methods do not change the part or component in any way.
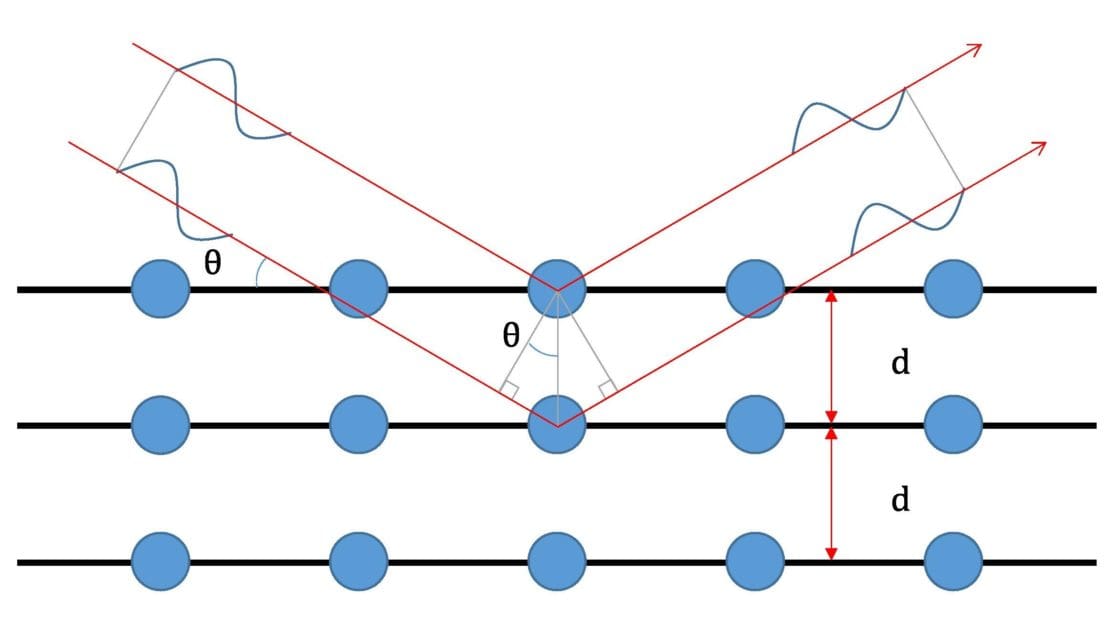
Some of the most common methods of measuring residual stresses include hole drilling, neutron diffraction, x-ray diffraction (XRD), and photoelastic stress analysis. Read this article to learn more about the differences between some of the most common methods.
Have Questions About Residual Stress?
There are a wide variety of ways to gather the data required to measure residual stresses within a part, component, or material. Measurement techniques can be categorized as either destructive or non-destructive. As their names imply, destructive methods alter the physical properties of the component being measured, while non-destructive methods do not change the part or component in any way.
Some of the most common methods of measuring residual stresses include hole drilling, neutron diffraction, x-ray diffraction (XRD), and photoelastic stress analysis. Read this article to learn more about the differences between some of the most common methods.

